In the old Brothers Grimm tale “Rumpelstiltskin,” a miller swears to the king that his daughter can spin straw into gold, a bold-faced lie. With the help of the eponymous imp and his magical powers, the daughter manages to pull it off—she only has to promise him her firstborn to make it happen.
Oddly enough, in the real world, there is one way to turn straw into gold, so to speak, that doesn’t require any special powers or bargaining with a scary creature—composting. Creating organic fertilizer from food scraps happens to be way easier than most people think. Here’s everything you need to know.
What is composting?
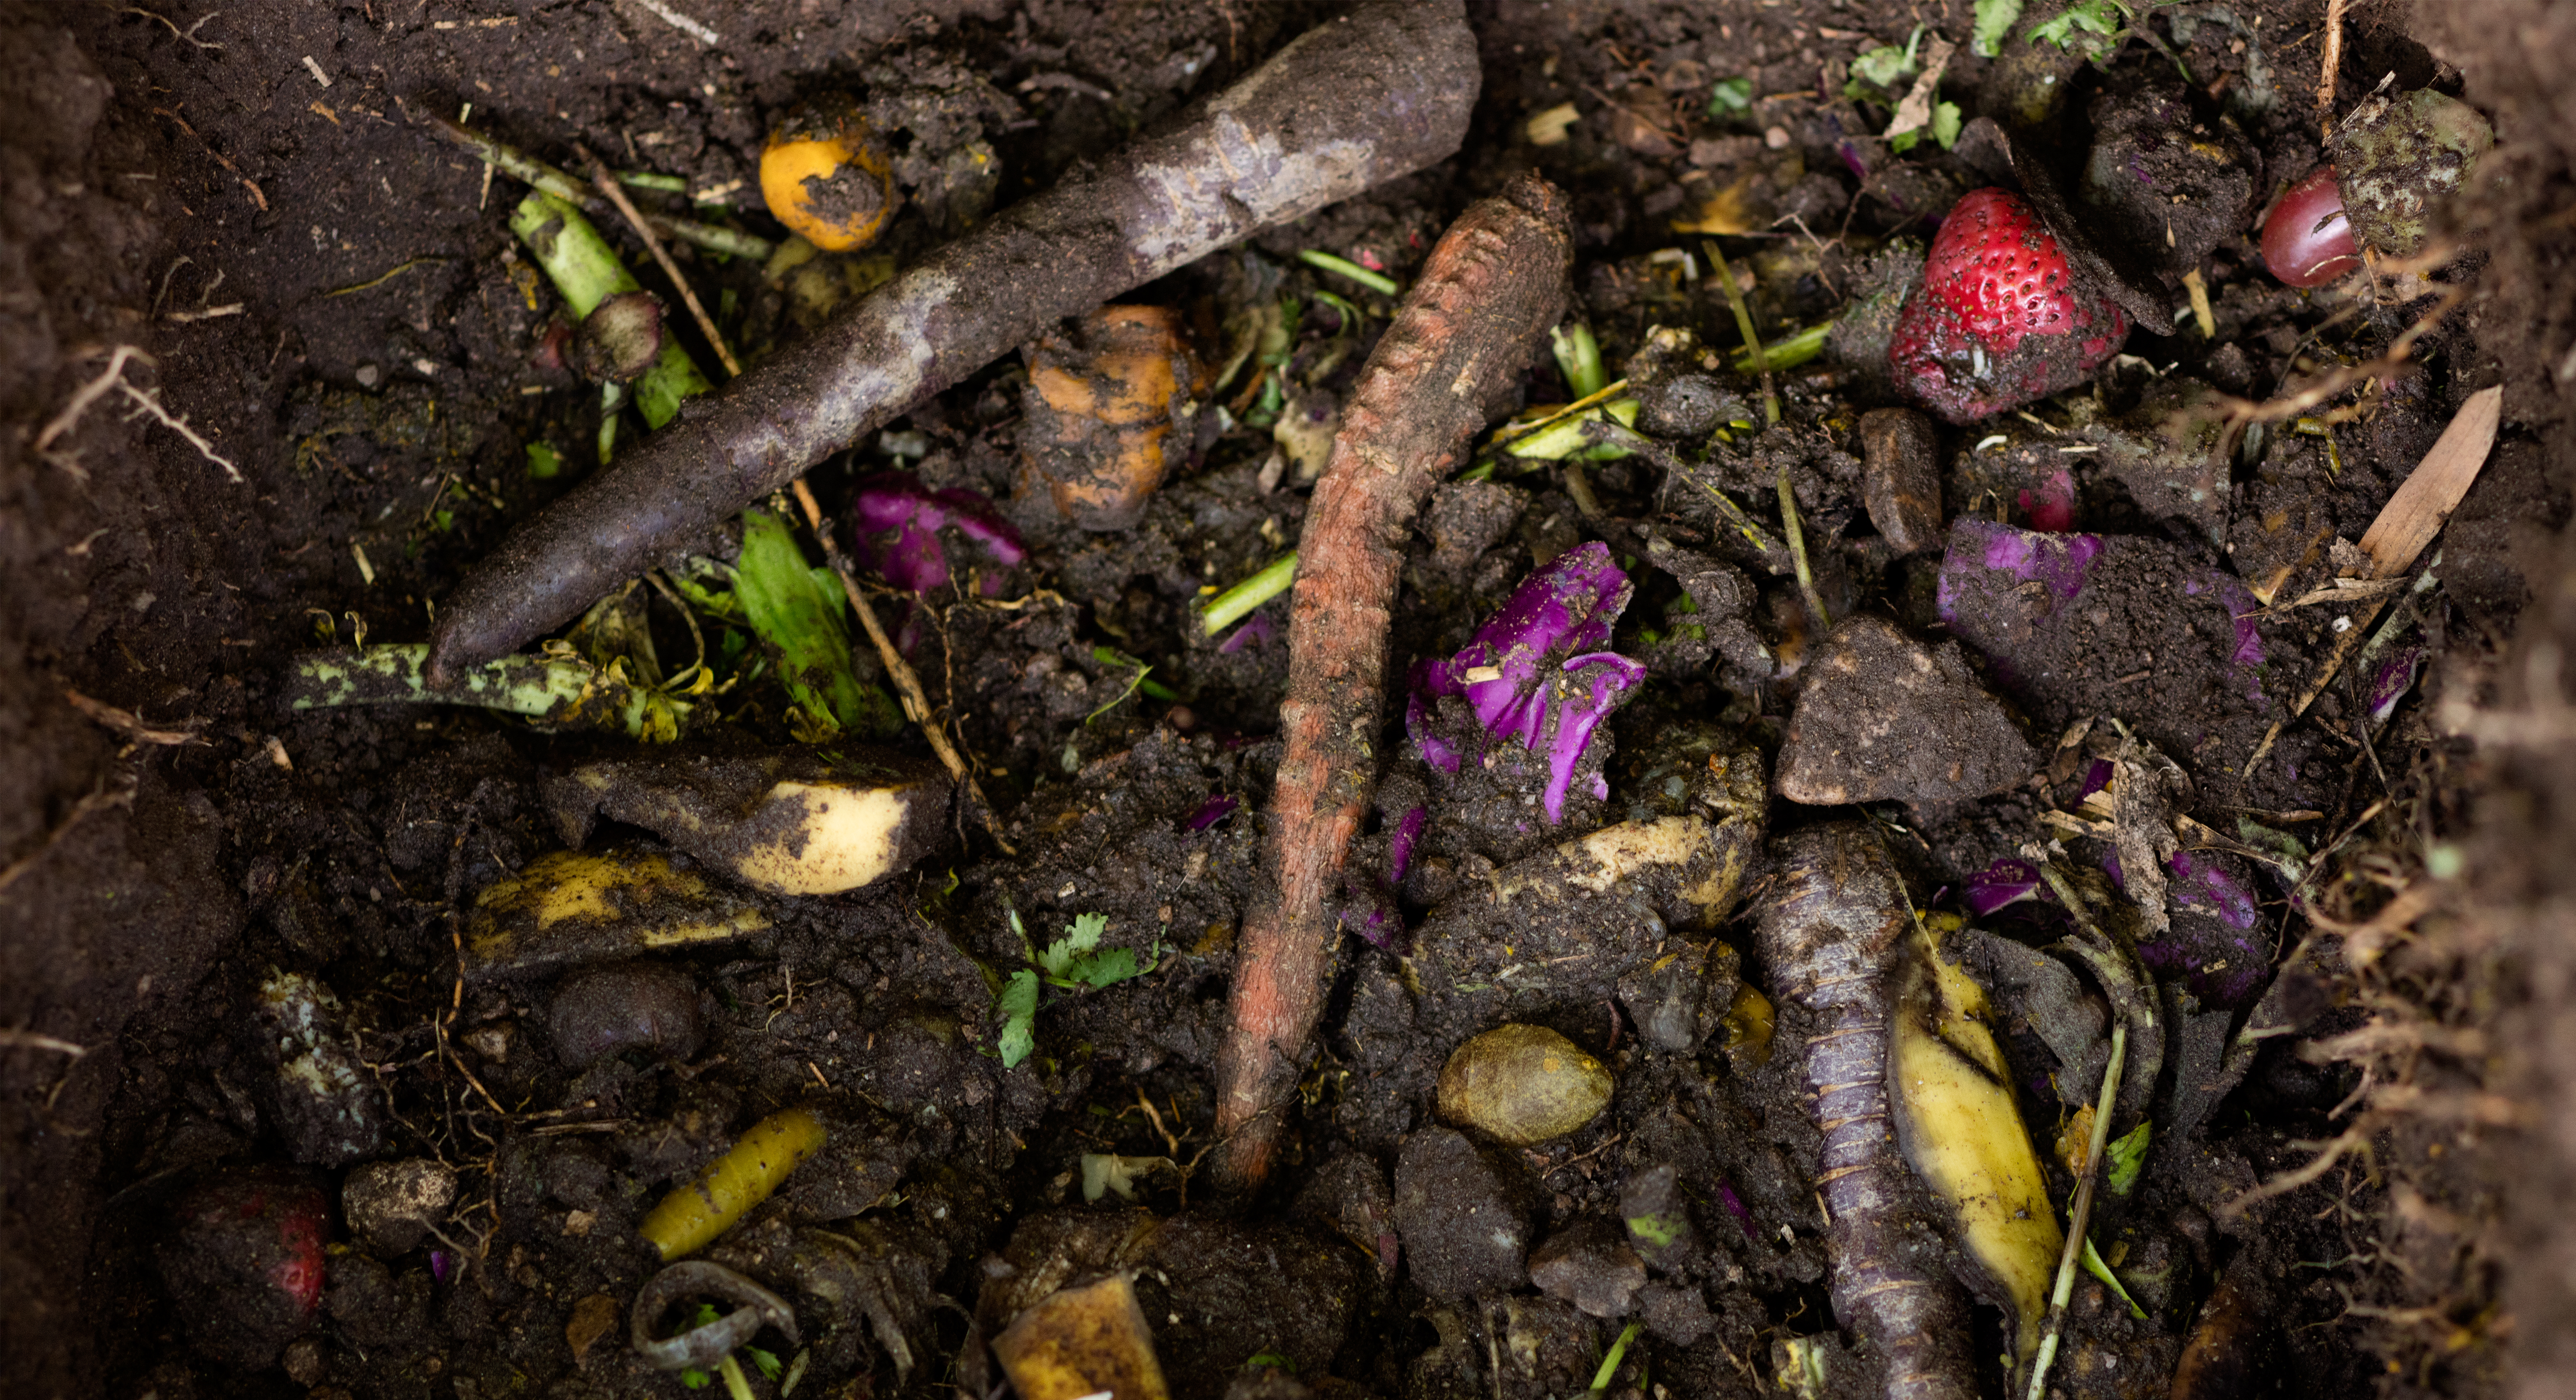
In basic terms, composting means recycling plant scraps from the kitchen—including carrot tops, potato peels, herb stems, celery fronds, eggshells, coffee grounds, used tea bags—to make garden fertilizer. The process transforms such food scraps, which would have normally ended up in the garbage, into a nutrient-rich mulch to add to soil and help you grow more fruits and vegetables. Now that’s sustainability at its finest.
How it works
As organic materials decompose, they break down into nutrients like nitrogen, phosphorous, and potassium—the same ones plants need to thrive. Brown matter, like dead leaves and branches, provide carbon. Green matter, like vegetables and fruits, provide nitrogen. Compost piles and bins ideally consist of three parts brown matter to one part green matter.
When these organic materials are exposed to air and water, microorganisms like bacteria, actinobacteria, fungi, protozoa, and earthworms start to break them down into compost. Carbon gives these microbes energy, and nitrogen facilitates protein synthesis.
After these microorganisms break down the plant matter, what you’re left with is a substance called humus, which basically looks, smells, and feels like dark, moist soil. Spread a thick layer of it on top of the soil in your garden—your plants will flourish! (We’ll get to more specifics below.)
Composting benefits
Reduces and recycles kitchen and yard waste
One of the greatest benefits of composting is giving food scraps and yard waste a second life. Instead of going straight to a landfill—where 40 percent of all food produced in the U.S. ends up—they’ll serve a new purpose in nourishing your garden naturally and even help you to cultivate more food.
Good for the environment
Compost can serve as a natural alternative to chemical fertilizers, which often seeps into groundwater and ends up polluting waterways.
Conditions and fertilizes soil
Compost helps give soil a softer, looser texture, which allows water and nutrients to reach the plants’ roots more efficiently. It’s all thanks to those beneficial microorganisms, which also can even kill pathogens and prevent plant disease, according to the Environmental Protection Agency.
What to compost
Here’s what can (and can’t) go into your compost heap, according to the EPA.
Brown matter
These are generally “dry” ingredients that are rich in carbon.
- Cardboard
- Corn husks
- Cotton
- Dead leaves
- Hay
- Nutshells
- Paper
- Pine needles
- Sawdust
- Shredded newspaper
- Straw
- Twigs
- Wood ashes
- Wood chips
- Wool
Green matter
These tend to be “wet” and are rich in nitrogen.
- Algae
- Bread
- Coffee grounds and filters
- Dead plants
- Eggshells
- Freshwater aquarium water
- Fruits
- Fur
- Grains (cooked, plain)
- Grass clippings
- Hair
- Seaweed
- Tea bags
- Vegetables
What not to compost
These materials may be harmful to the health of your compost.
- Black walnut tree leaves and twigs
- Charcoal
- Dairy products
- Diseased plants
- Dryer or vacuum lint from synthetic fabrics
- Fats or oils
- Glossy paper (especially with color printing)
- Meat or fish scraps or bones
- Pet waste
How to compost
It’s easy to start composting at home. Whether you have a big backyard or live in an apartment with no outdoor space, here’s how to do it.
Composting in a backyard
-
- Pick a spot
The first step is to pick a dry, sunlit area outdoors, and near a water source (like a garden hose). Be mindful to choose a spot where the appearance or smell won’t bother your neighbors. It’s best to keep it far away from anywhere you eat or entertain, too. You should also avoid placing it near the house or any other wooden structures, as the decomposing materials may rot wood.
-
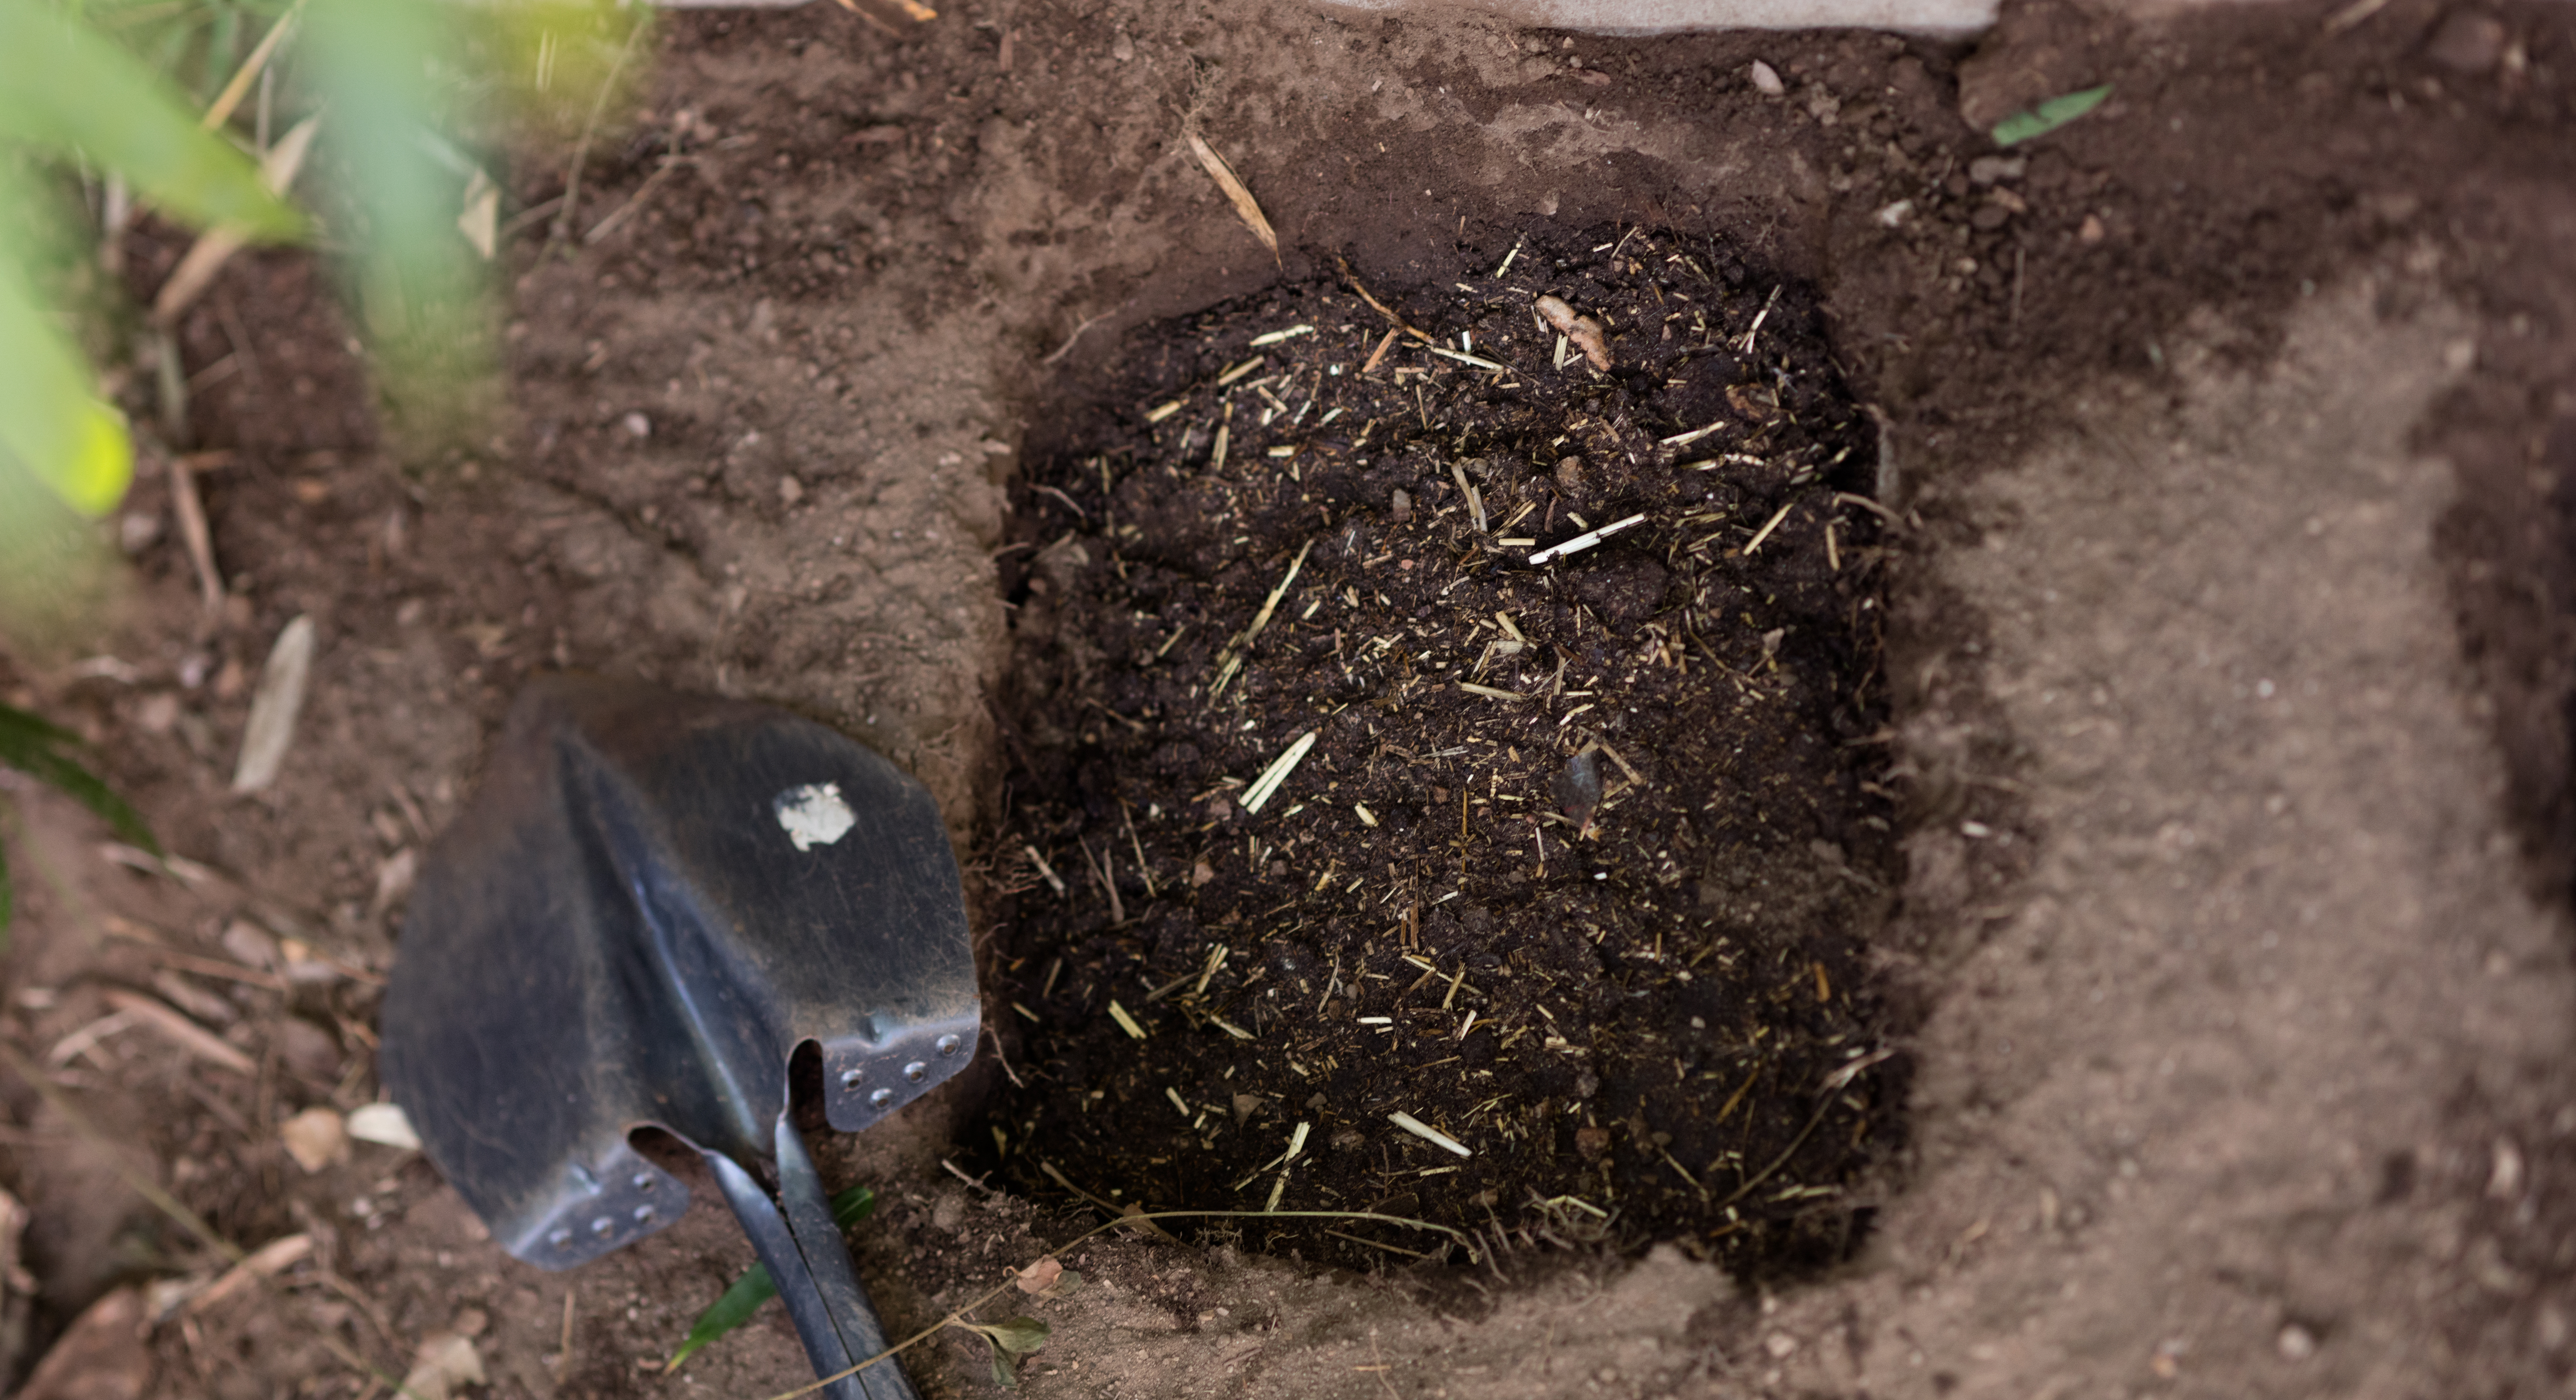
- Dig a hole or buy a compost bin
If you don’t mind letting your compost heap sit exposed, it’s a good idea to dig a hole in the ground to make it easier to manage. Make sure the hole measures at least 3’ x 3’ x 3’.
You can also buy or build a holding unit or bin. Home and garden stores like Home Depot offer plenty of options, or if you want to make a DIY version, check out how to do it here. A closed bin with a lid also works—drill holes into the lid to allow air in, and add your own worms (you can pick those up at home and garden stores, too).
-
- Start adding organic materials
Add compostable materials in layers, starting with brown matter, then green, and some brown again. Try to maintain a ratio of three parts carbon (brown) to one part nitrogen (green). Too much carbon can slow down the decomposition, while too much nitrogen can make the pile slimy, smelly, and difficult to aerate.
-
- Turn and add water
If you aren’t continually adding new matter, let it sit for five weeks. Then, turn it with a pitchfork or rake to oxygenate the mixture, and add enough water to dampen the pile. (Excess moisture hinders airflow, and too little prevents the microorganisms you need to start decomposition from thriving.) Leave it for three or four months longer—it’ll turn into dark, moist soil, and that’s how you’ll know it’s ready to use.
However, most people tend to add new materials throughout the year. In this case, whenever you add new food waste or kitchen scraps, bury it to incorporate. Turn and moisten the pile at least every four to five weeks, but keep in mind that turning more often can really speed up the decomposition process.
Composting indoors or in an apartment
No backyard? No problem. You can make your own small-scale composting system indoors—and you don’t even need worms. Here’s how.
What you need
- Small trash bin with a lid
- Tray that fits underneath trash bin
- Soil
- Newspaper
Instructions
- Choose a space to keep your compost bin. (Under the sink works well.)
- Poke or drill a few holes on the bottom and around the rim of the bin.
- Cover tray with newspaper and place the bin in the tray.
- Add a layer of soil, a few inches deep, into the bin.
- Add a layer of shredded newspaper into the bin.
- Start adding your food scraps (green matter as listed above), along with a handful of newspaper or other brown matter as you go. (If it starts to smell bad, add more brown matter.)
- Once a week, mix the pile and add a handful of fresh soil.
You’ll know the compost is ready when it’s broken down into dark, moist soil. Use it as a top layer for potted plants or donate it to a neighborhood garden.
Top composting tips
- Start your compost in summer. The process works best in heat—a compost pile that maintains an internal temperature of 130 to 150 degrees Fahrenheit breaks down faster.
- Keep a small compost bin in the kitchen. It’s a convenient way to collect food scraps without having to run out to the compost pile every time you have something to add. Once your indoor bin is filled, you can throw it all into the pile at once.
- Always keep a healthy balance of of carbon to nitrogen (brown to green). Remember: three parts brown to one part green. Too much or too little of either can slow things down.
- The smaller the materials, the better. Before adding things into the compost, cut them down to smaller chunks to help them to decompose faster.
- Don’t pack too much waste in. The pile needs air to breathe.
- The more green matter you use, the less water you need. Remember that too much water keeps the air from flowing freely through the mixture.
- Do not compost pet waste. It can contain parasites.
- Do not compost meat, meat scraps, or fats or oils. Otherwise pests will come crawling and potentially spread disease through the compost.
- Worms are your friends. When these guys show up, leave them be and let them do their thing. They’ll feed on your food waste and help turn it into the beautiful compost you’re waiting for.
- You can compost weeds. Just make sure they don’t have seeds, or else you may get some pesky plants cropping up in your garden.
- Turn your pile frequently. Aerating the compost as often as every two weeks can really speed up the process.
- Keep two separate compost piles. Got a lot of organic material and extra space? Starting a second pile is handy so you can let the original break down faster while continuing your composting habit.
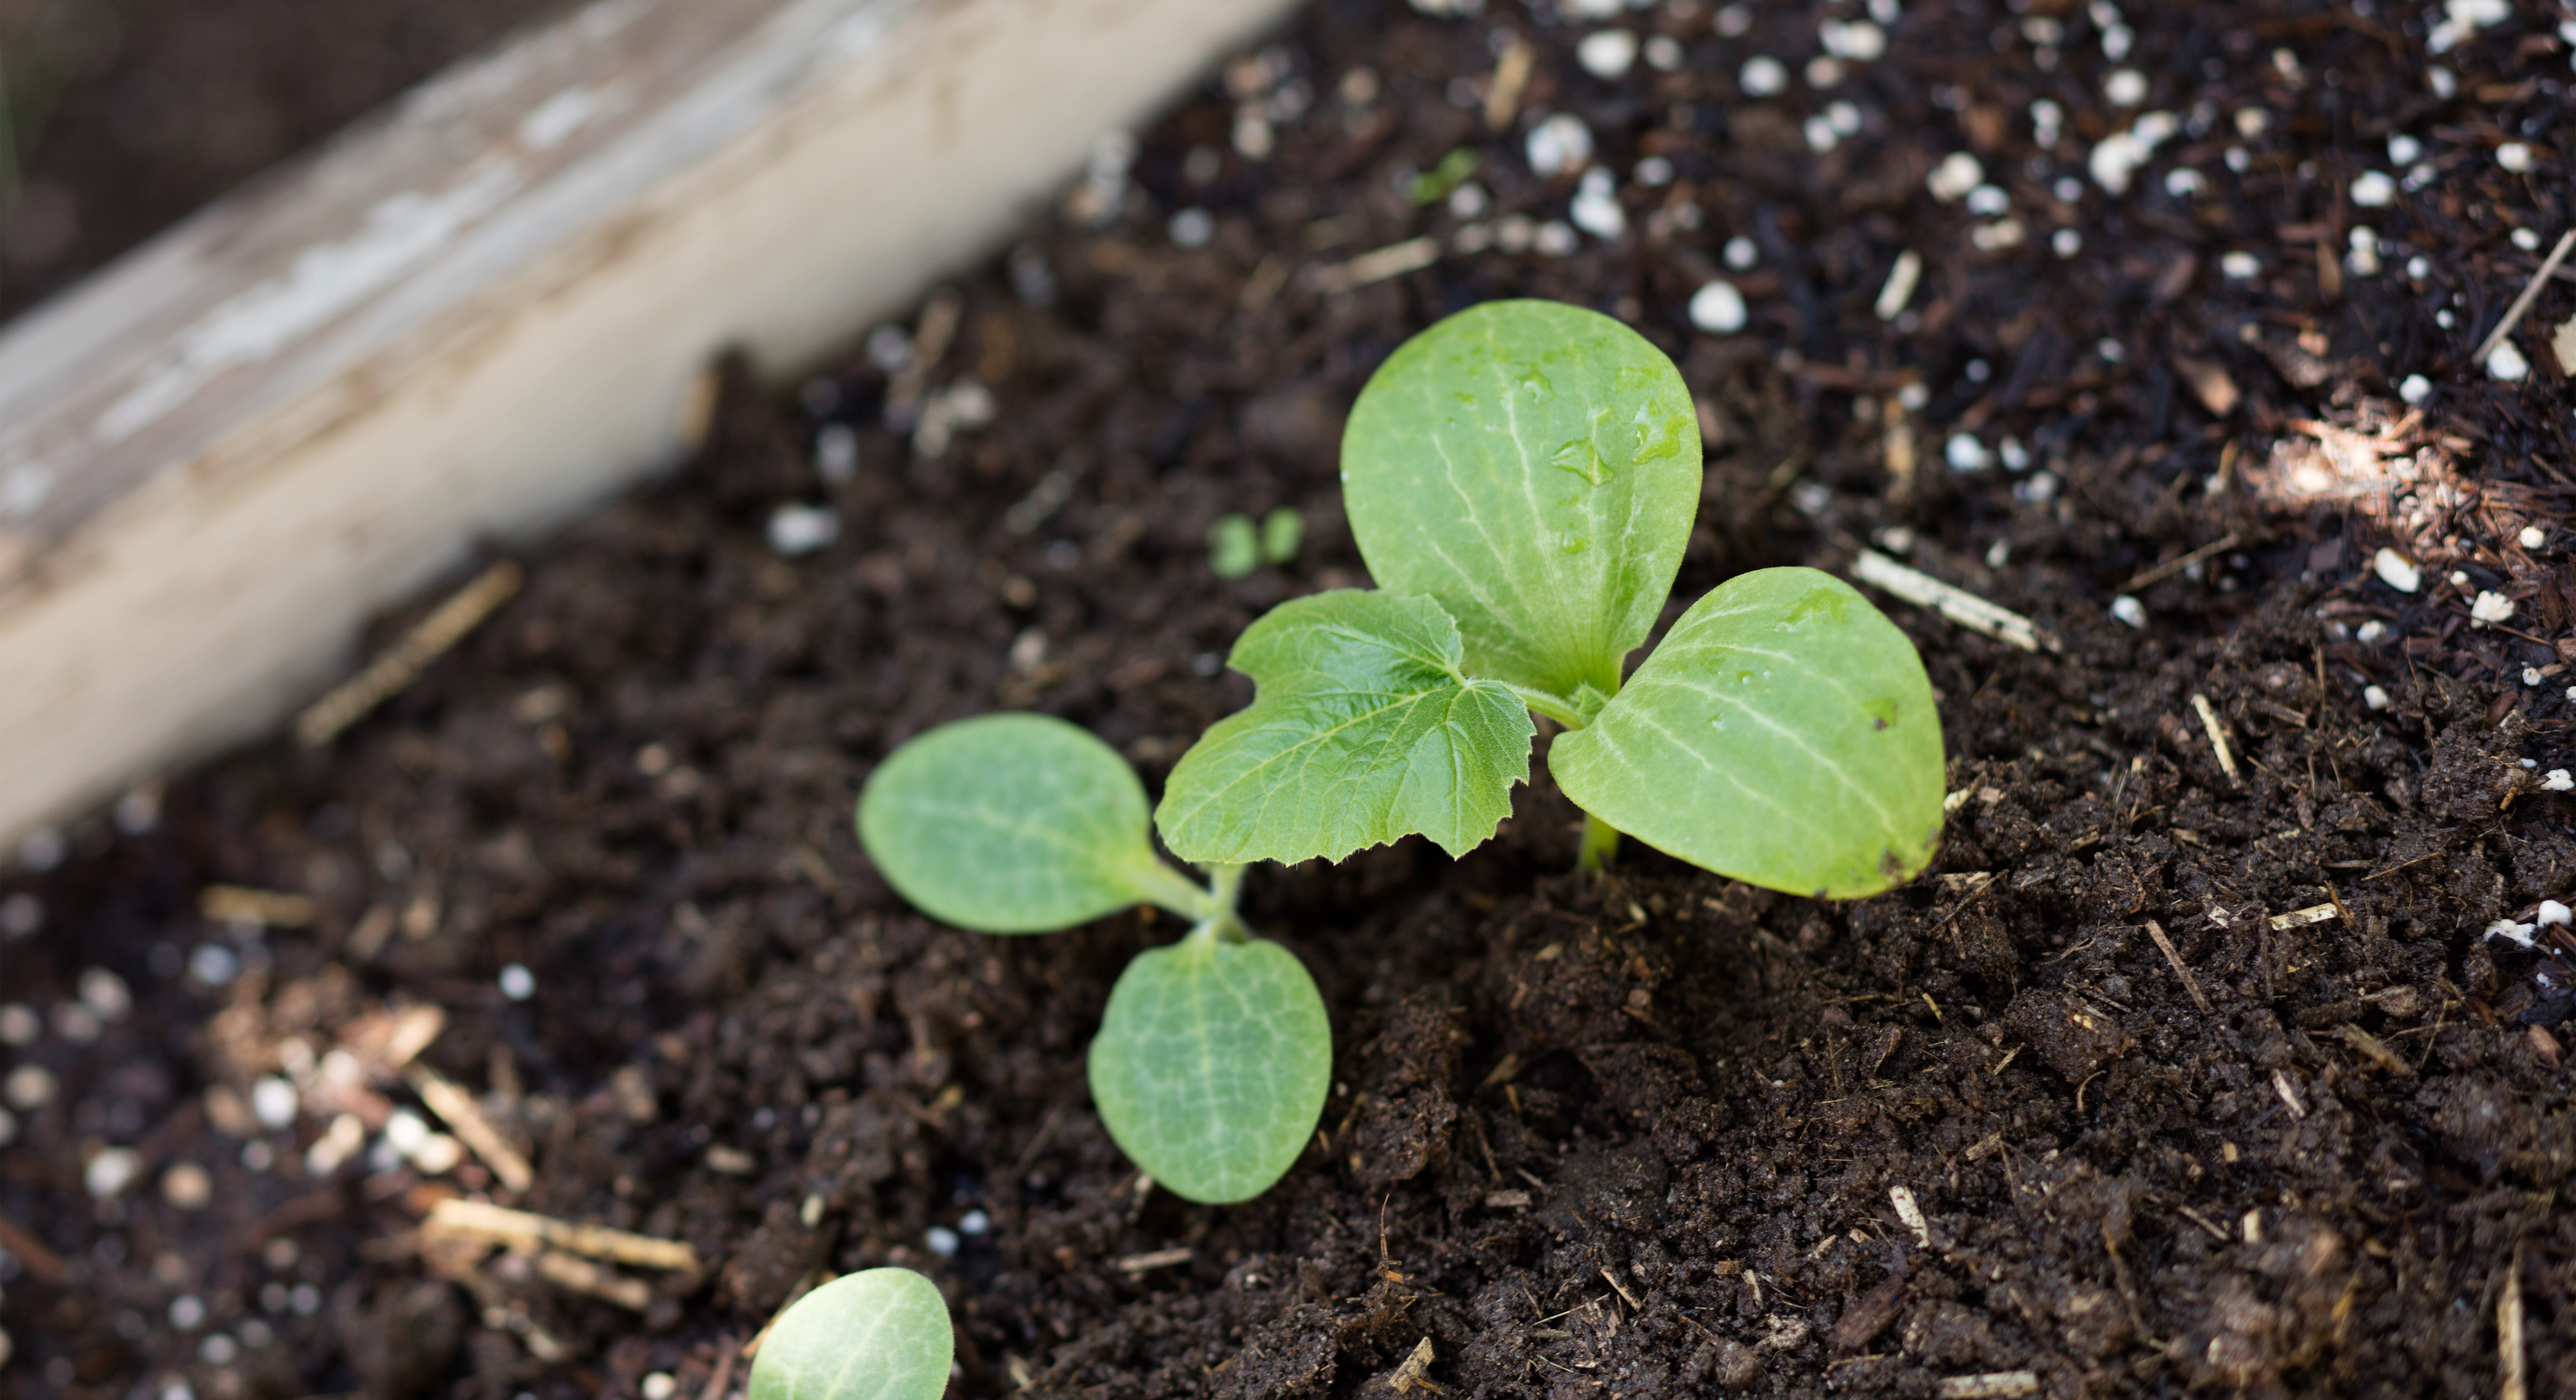
- Add compost to the garden two to four weeks before planting. This allows time for it to meld with the soil. Once you’ve got it all ready to go, it’s time to plant the seeds. When beautiful, bright-orange carrots grow in, you’ll be pretty happy you didn’t trash those old peels.
Photo credit: Paul Delmont
This article is related to:
Eco-Friendly, Gardening Tips, Healthy Living, Home Trends, Sustainable, Sustainable Agriculture, Sustainable LivingShare this article

Dana Poblete
Dana's love for all creatures under the sun (bugs, too) drives her in her advocacy for ethical eating, environmental sustainability, and cruelty-free living. A natural born islander, she surfs when she can, and writes, always.