3 Probiotic-Packed Fermented Foods That Are Super Easy to Make
Last Update: September 29, 2022
Probiotics are the key to a functioning gut, happy brain, and beautiful skin. And sure, taking a pill to ensure you get enough healthy bacteria in your system is fine. But wouldn’t you rather eat your way to better health?
It’s possible to get the probiotics your body needs—plus prebiotic fiber, which feeds gut bacteria and helps keep you regular—by snacking on the right foods. The key to making something more gut-friendly? Fermentation.
Typically a process used to extend the shelf life of produce and dairy, fermenting anything involves adding a starter (more on that later) to the food in a low-oxygen container. Then the container is left undisturbed at room temperature for a few days or weeks, depending on the recipe. This cool, oxygen-deprived jar is the perfect place for bacteria like lactobacilli—a common strain found in many probiotic pills—to grow. Although it may seem counterintuitive, allowing healthy bacteria to multiply and flourish is safe, and eating fermented foods is one of the easiest ways to get your gut health on point.
Plus, the process has been used for centuries to help preserve raw foods; for example, the traditional way to make pickles is fermenting cucumbers. If you’ve got a ton of extra veggies on hand or notice that gallon of milk you’ve yet to touch is about to go bad, you can use fermentation to lengthen the lifespan of those foods. Plus, fermentation is super cheap and you can customize your recipe—and final product—to your liking. Way better than the store-bought stuff, right?
Three of the most common fermented foods are sauerkraut, kefir, and miso soup—and it turns out they’re really easy to make at home. We gathered three basic recipes that are perfect for anyone who wants to try their hand at the process—we promise it’s way less intimidating than you think!
1. Sauerkraut
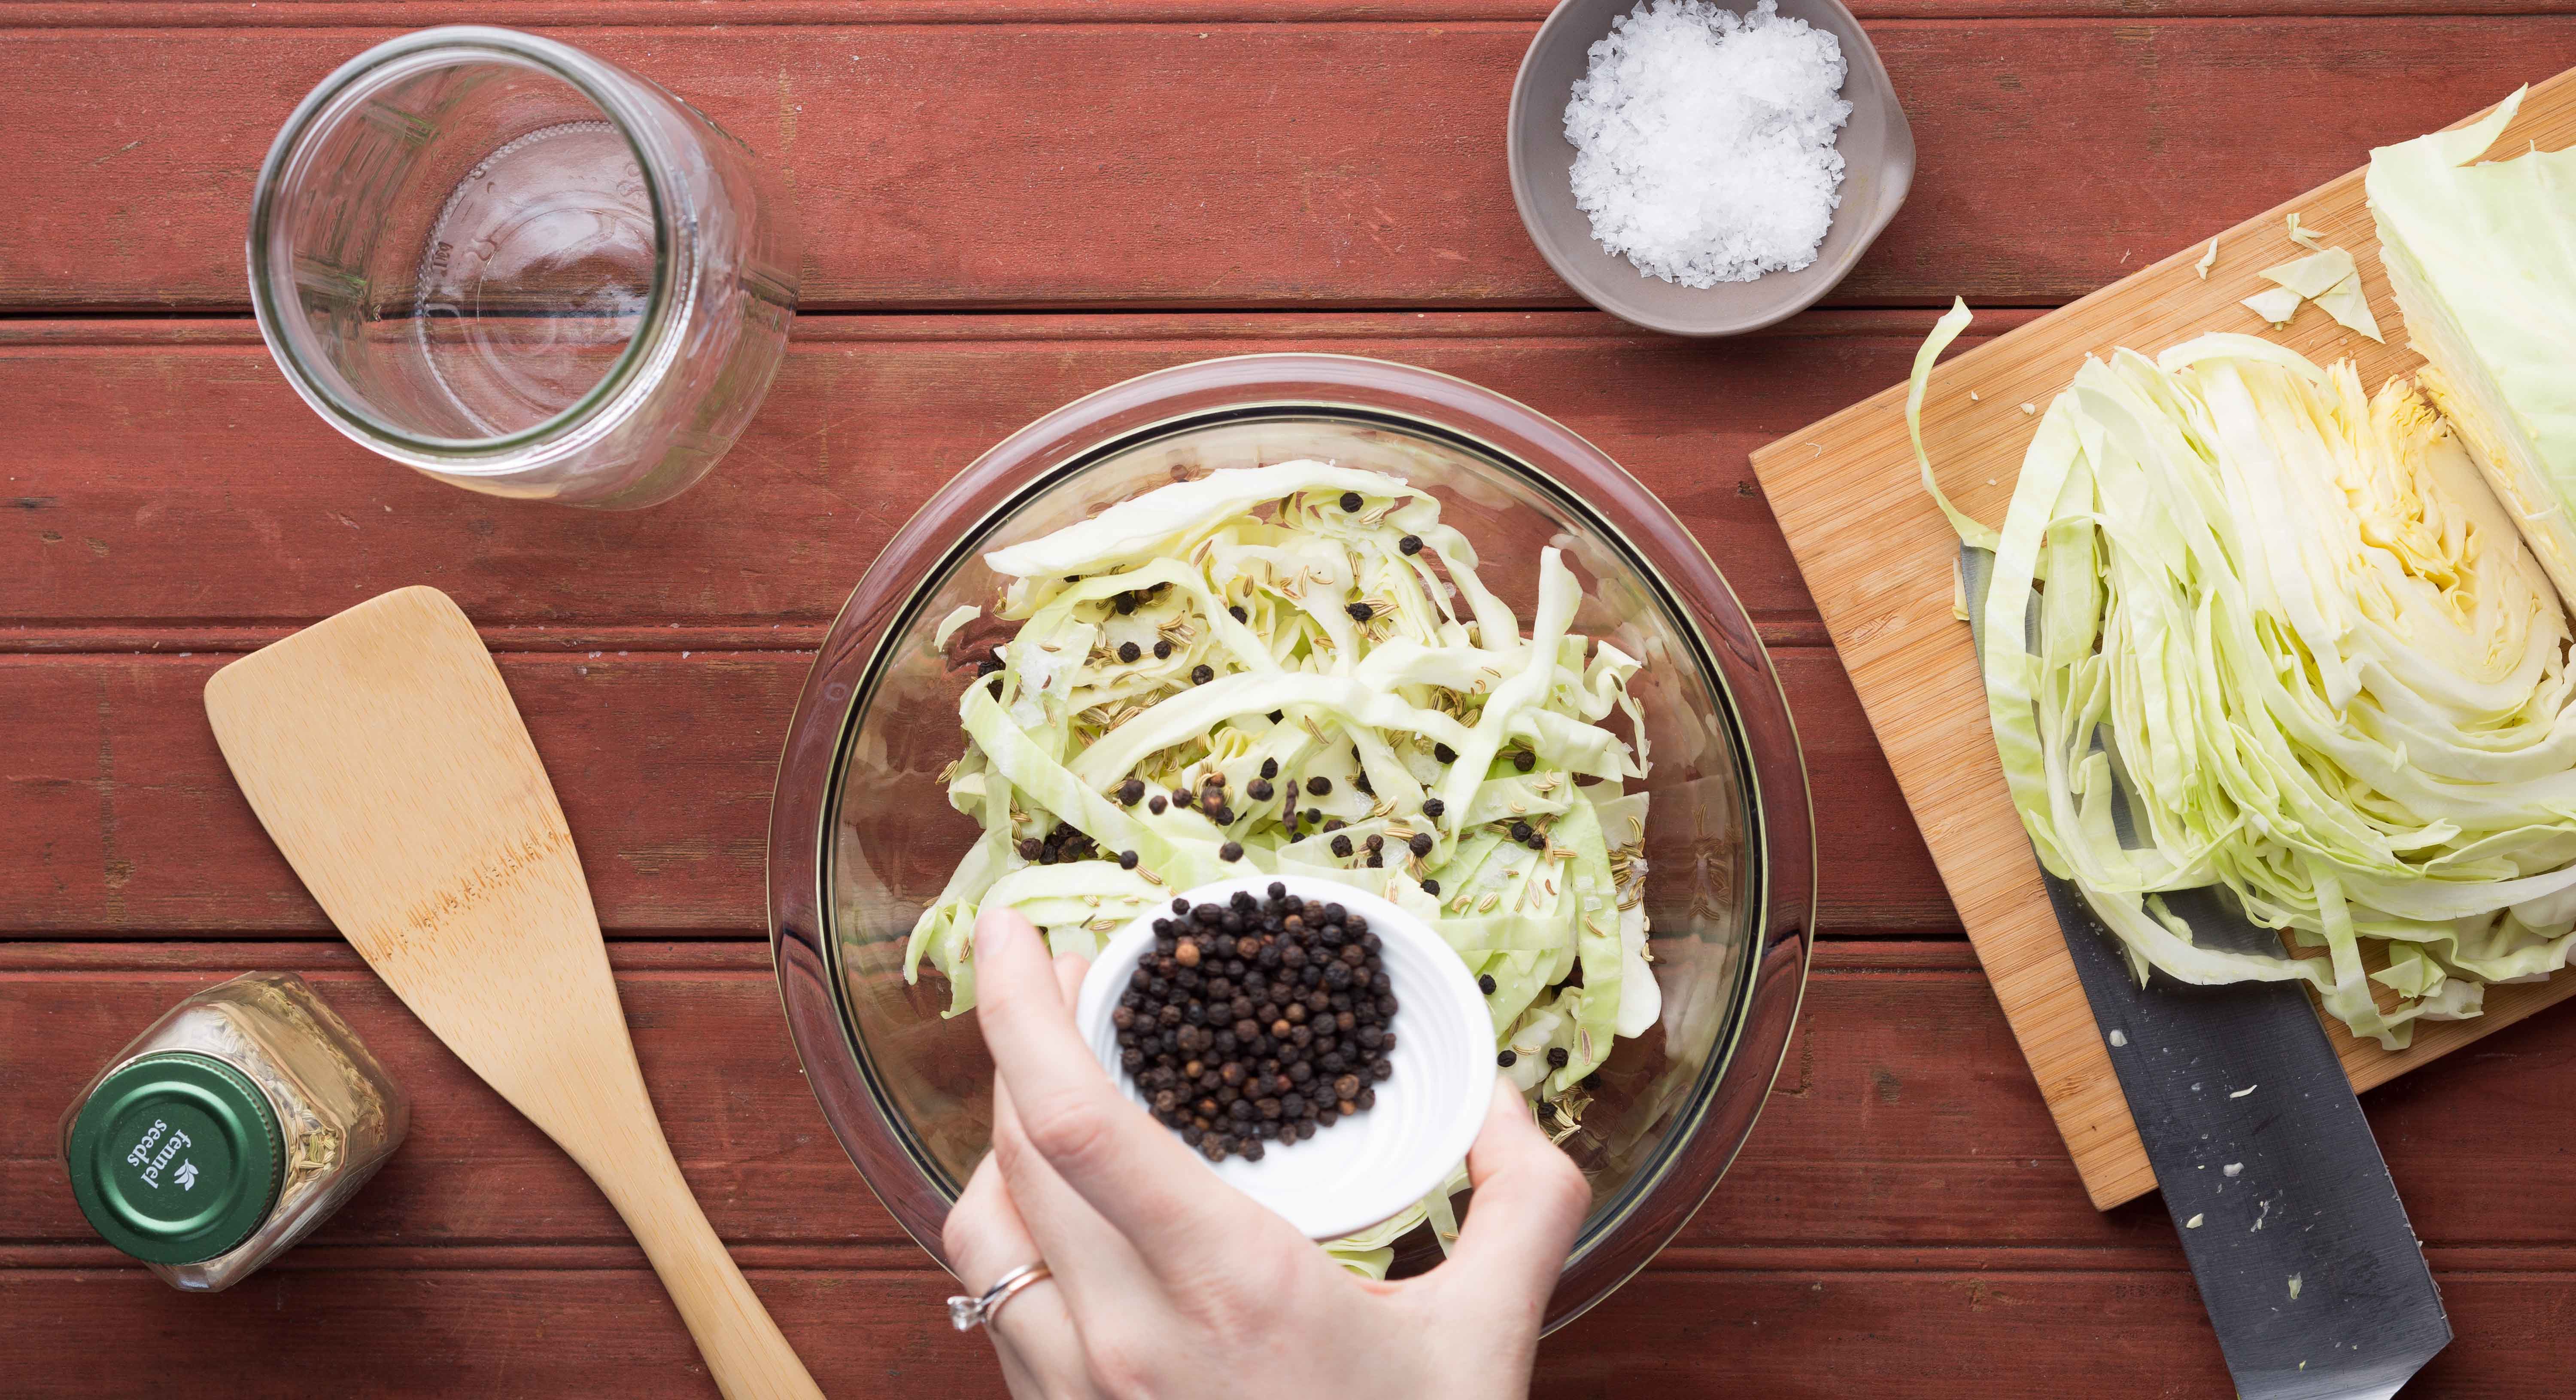
What is it: Sauerkraut is just cabbage and salt. Yes, really—and anyone can make it. A full head of cabbage yields a ton of kraut, so you’ll have plenty to pile on sandwiches, salads, and hot dogs.
What you need: A head of chopped cabbage (green or white), 1 1/2 teaspoons of salt, a sealable glass jar, and a cheesecloth

How to make it: Start by washing and shredding a head of cabbage. In a bowl, combine cabbage and salt. Then massage the salt into the cabbage gently for 5 to 10 minutes. It should start to wilt a little; if you’d like to add any extra flavors (think: peppercorns, radishes, or jalapeños), now’s the perfect time.

Pack the mixture tightly into a glass jar, and cover with the cheesecloth, and secure it with a rubber band. Leave out at room temperature for anywhere from three to ten days to allow for full fermentation. After three days the flavor will be subtle, but the longer you let it go, the more tangy and tasty it’ll get. Throughout the process, check to make sure the cabbage is submerged in the brine that’s created as the leaves get broken down by the salt and bacteria.
You can taste as you go, once a day starting on day three—once you’re happy with the flavor, cover and move to the fridge to store. Technically, as long as it’s covered by the brine, sauerkraut keeps in the fridge for up to a year. But it may lose its satisfying crunch if it goes unused for too long. If that happens, you can always whip up another batch!

2. Kefir
What it is: Kefir is a slightly tart dairy product with a texture somewhere between milk and yogurt. Its light taste and consistency makes it ideal to add to a morning smoothie, pour over your favorite granola, or sip all on its own. You can make your own in about a day, just by adding kefir grains to milk. Kefir grains resemble cauliflower, and are actually a combination of lactic acid bacteria and yeast. When added to dairy, they kickstart probiotic bacterial growth.
What you need: Kefir grains, milk, a cheesecloth, and a sealable glass or ceramic jar
How to make it: Add about 1 teaspoon of kefir grains to 1 cup of milk in a jar, cover with the cheesecloth, and allow to sit out for 24 hours at room temperature. Voila! The kefir should be totally ready to eat and drink. Bonus: Fermenting milk with kefir grains not only adds beneficial probiotics, but also extends it’s shelf-life for two to three weeks. Just note that once the fermentation is done, kefir should be sealed and stored in the fridge.
3. Miso soup
What it is: Miso soup is a sushi shack favorite—but most people don’t realize just how easy it is to cook at home. Made from fermented soy beans, miso paste is what gives this salty soup its distinctive flavor and its gut-friendly microorganisms.
What you need: Miso paste and water—that’s it!
How to make it: Add 1 tablespoon of miso paste to 1 cup of water and bring to a boil. Add tofu, green onions, and nori if you’d like to make it more substantial.
Didn’t think fermenting your own foods could be this easy, huh? It might be time to embrace this obsession-worthy DIY as a new hobby.
Wanna learn more about the power of probiotics and how to choose the supplement that’s right for you? Press play on the video below to find out why you should never buy the refrigerated kind, and exactly what CFU stands for.
Photo credit: Alicia Cho

Michelle Pellizzon
Certified health coach and endorphin enthusiast, Michelle is an expert in healthy living and eating. When she's not writing you can find her running trails, reading about nutrition, and eating lots of guacamole.
Download the app for easy shopping on the go
By providing your mobile number, you agree to receive marketing text messages from Thrive Market. Consent not a condition to purchase. Msg & data rates apply. Msg frequency varies. Reply HELP for help and STOP to cancel.
This site is protected by reCAPTCHA and the Google Privacy Policy and Terms of Service apply.